Make Your Own Spring Flower Necklace
Spring is a time of rebirth. Flowers are popping up and bringing color back into the world. This project was inspired by Frozen, 2011, a nature-themed necklace by artist Sam Tho Duong. Imagine what the frozen seeds would look like if they thawed and bloomed.
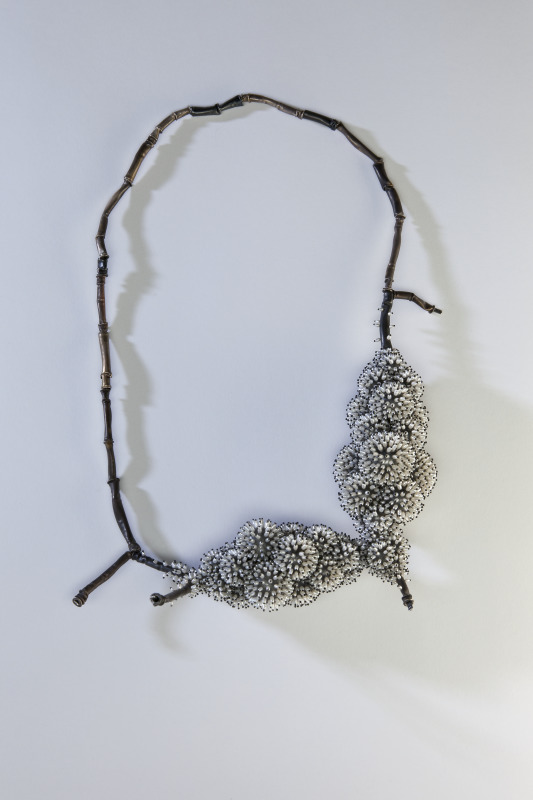
Sam T. Duong (Vietnamese, 1969 – ). Frozen, 2011, silver. Museum Purchase: Exchange Funds from the gifts of various donors in fond memory of Edward K Jones (6/3/1970-7/1/2010) and his many contributions and enthusiastic support of the Mint Museum of Craft + Design. 2011.28
This project has lots of room for creative variation. It can work with felt or paper. The necklace can be made with pipe cleaners, ribbon, or string. Another option is to use the flowers to create a wreath or a card to give to someone you love for spring holidays, birthdays, or Mother’s Day. Experiment with texture and color to create a unique arrangement.
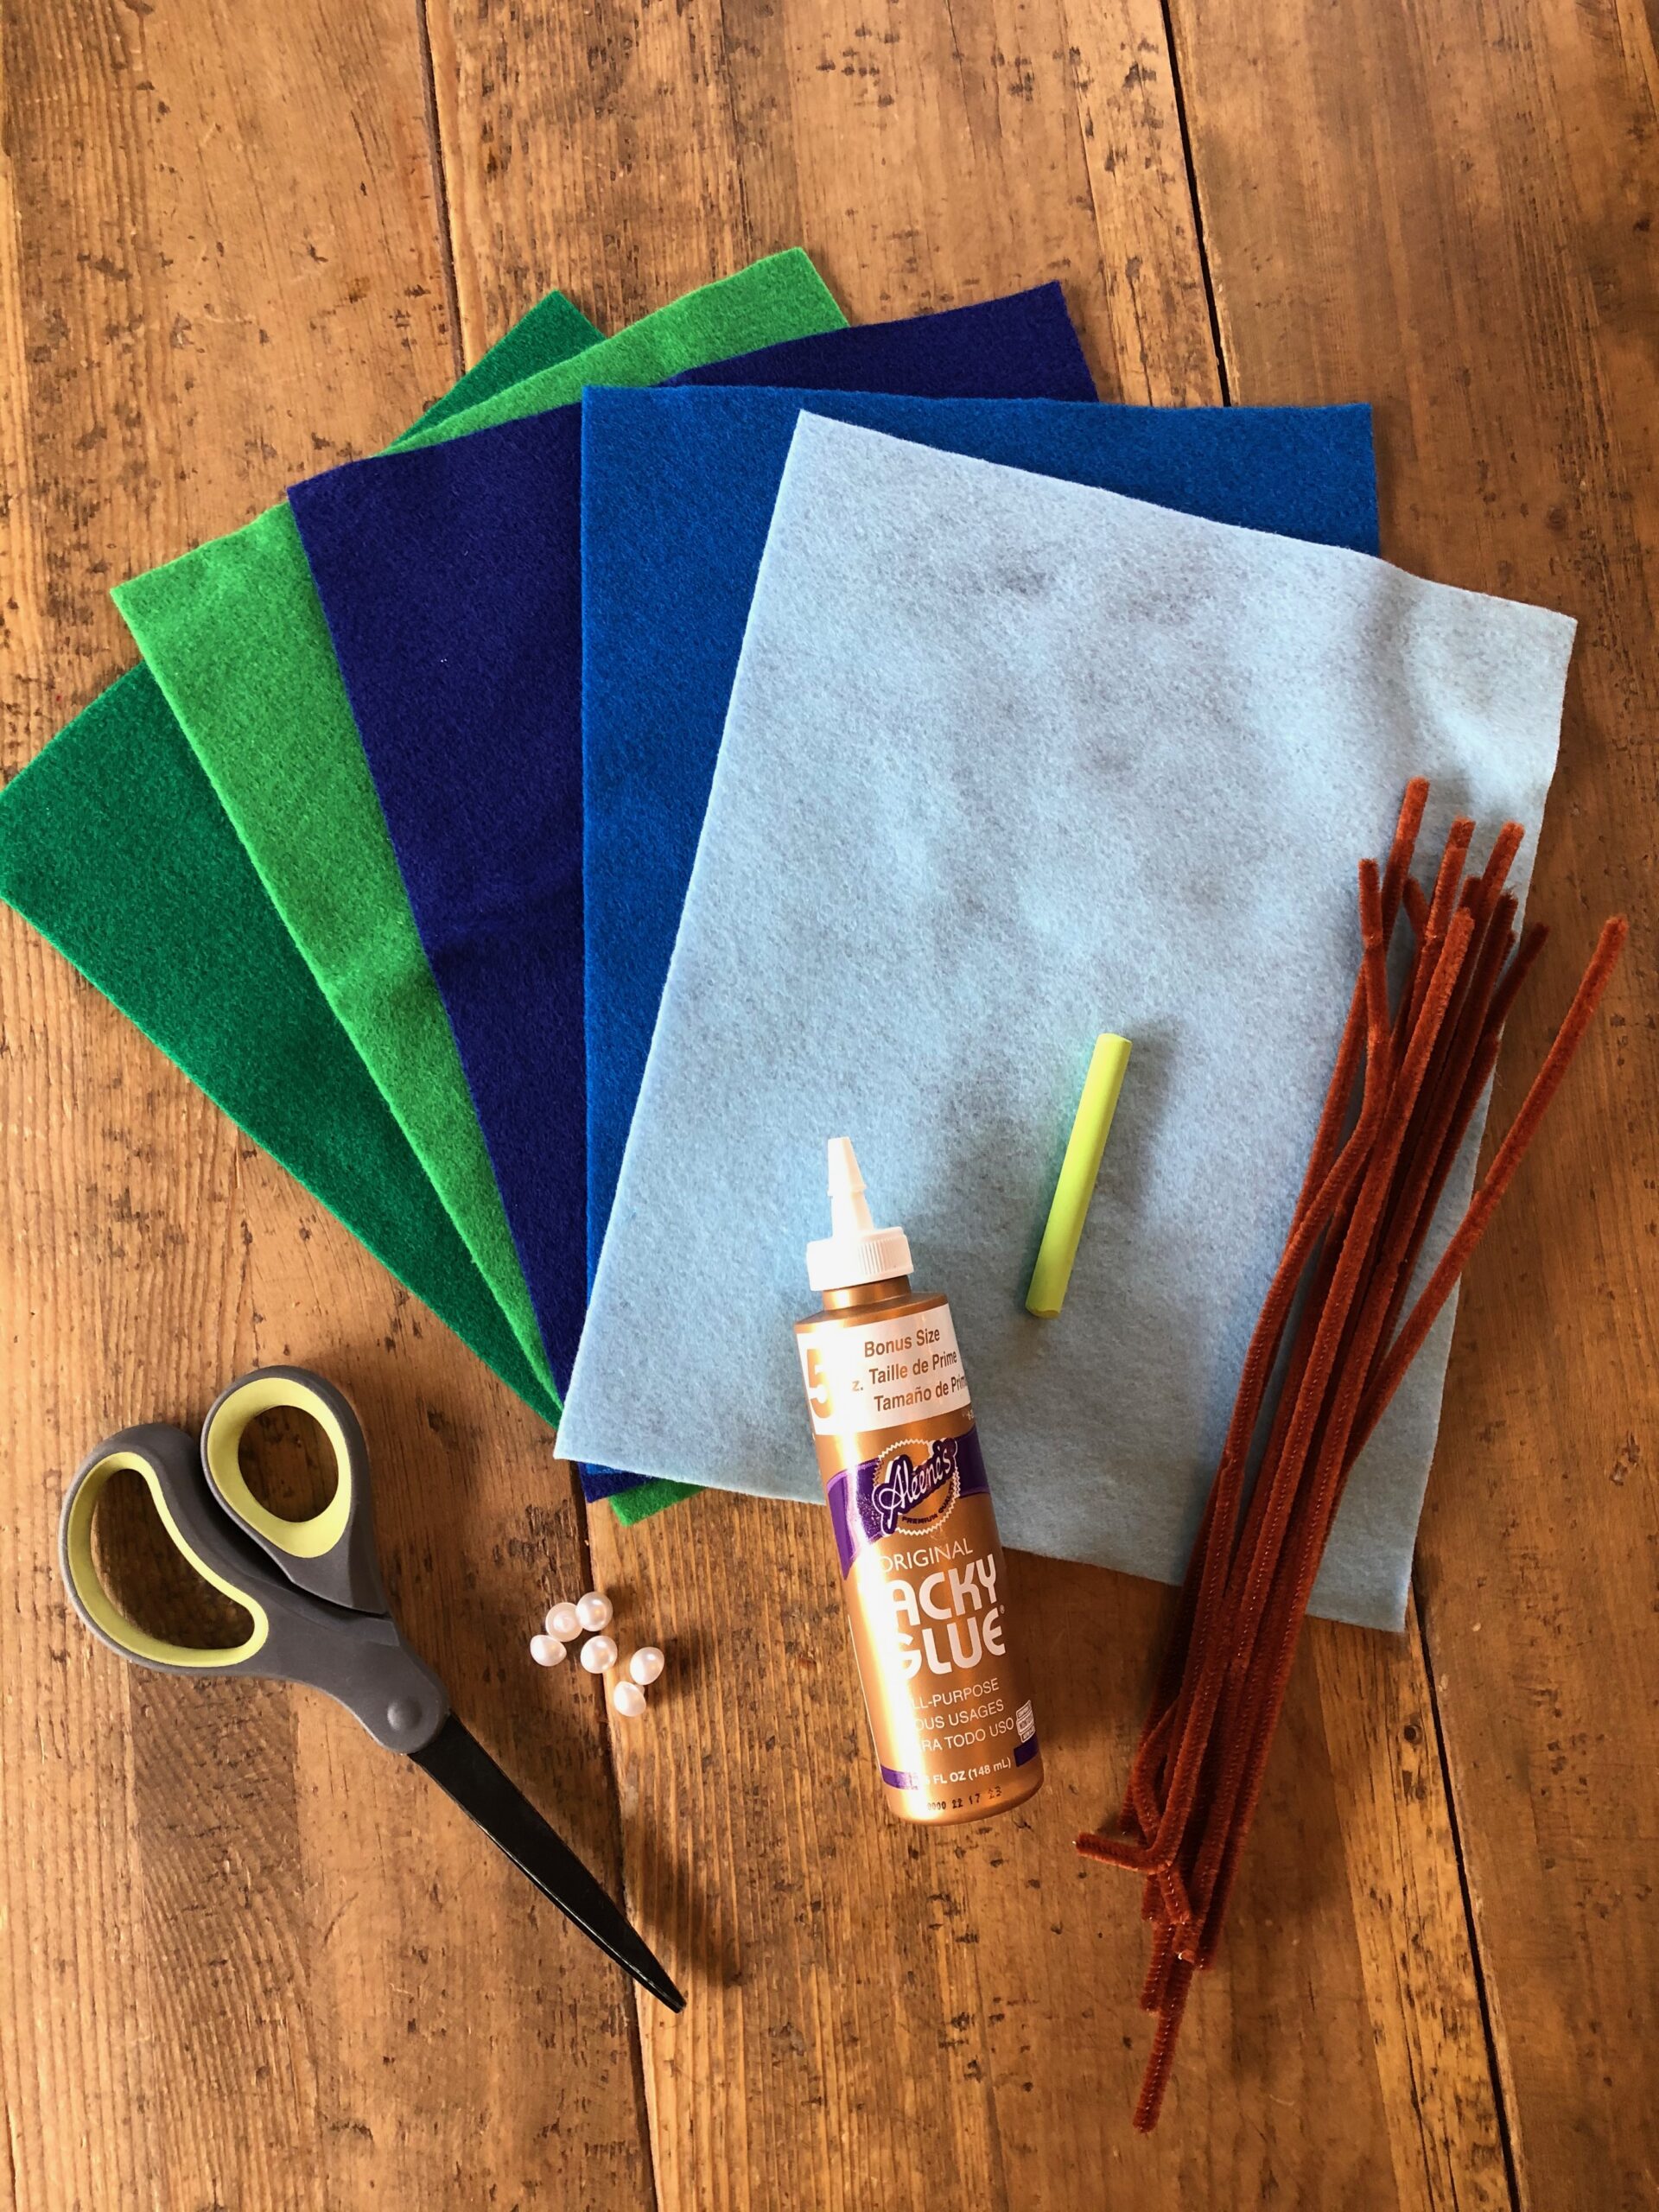 SUPPLIES:
- Felt or colored paper*
- Pipe cleaners, ribbon, or string (optional)
- Pencil or chalk
- Scissors
- Liquid glue (tacky works best on fabric)
- Round object such as a mason jar or roll of tape to trace different size circles
- Buttons or beads for decoration (optional)
*Note: if you don’t have felt or colored paper, no problem. Just use plain paper and color with crayons, colored pencils, watercolors or markers.
STEPS:
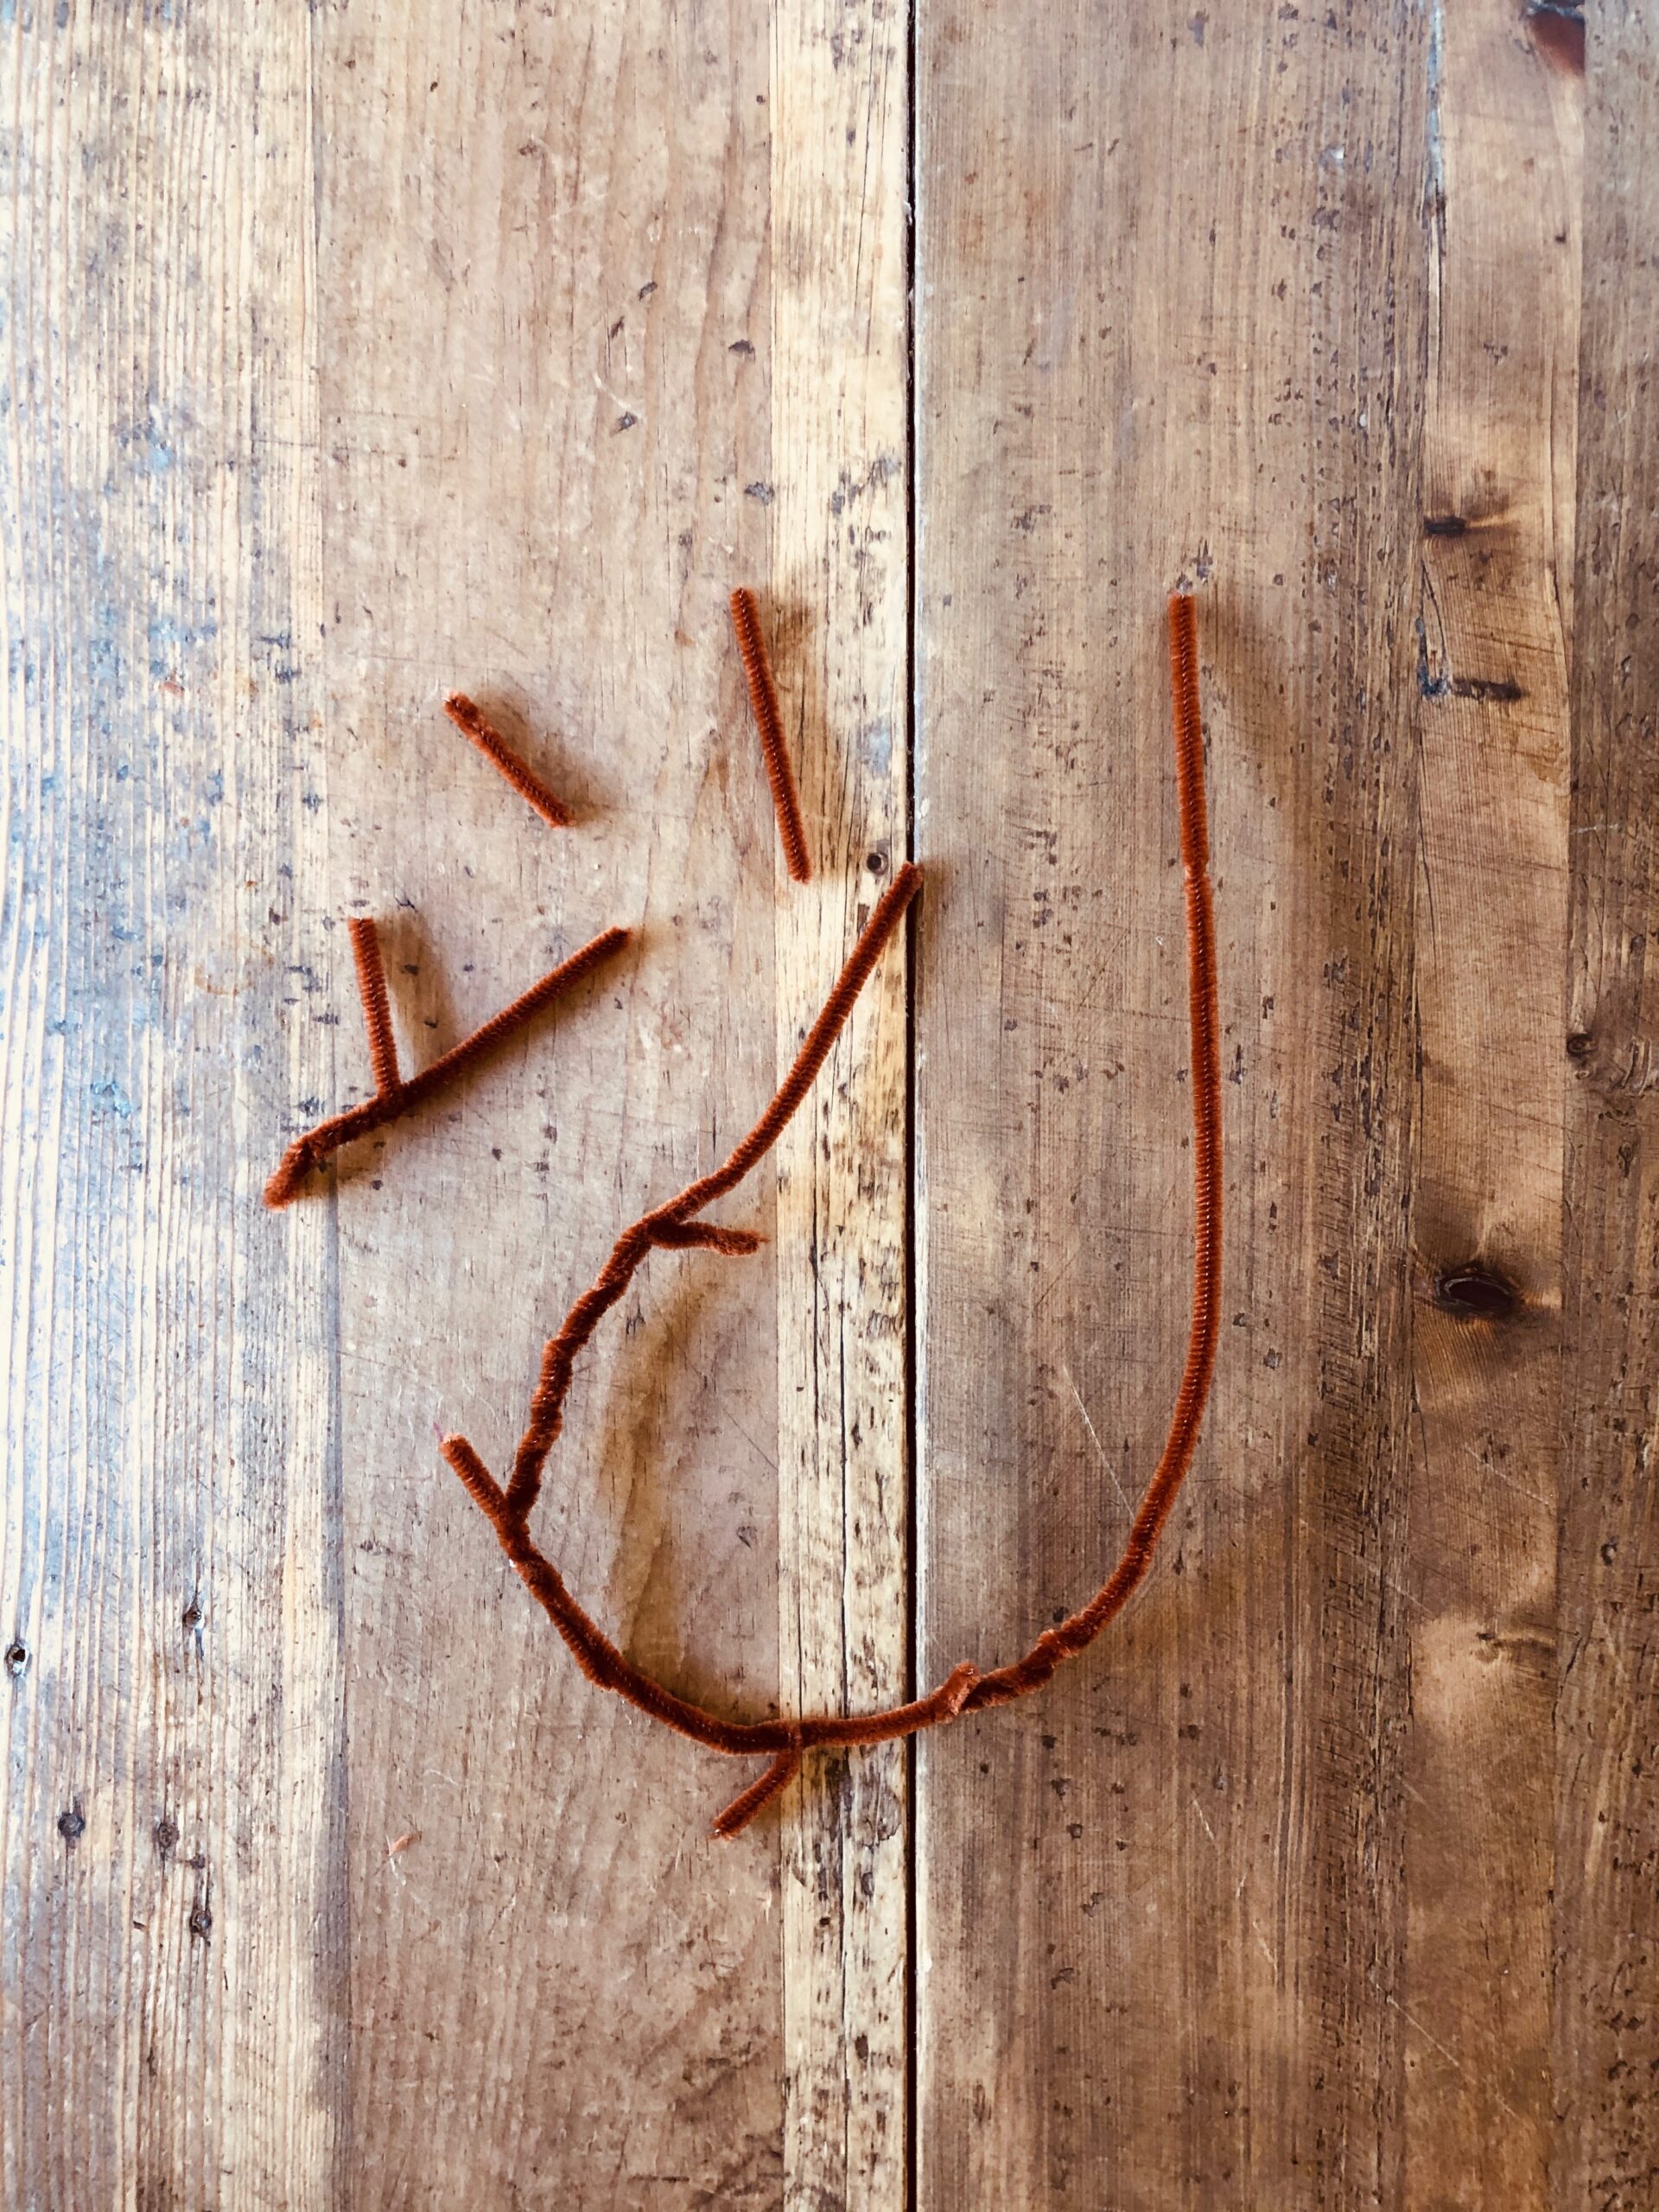
Use pipe cleaners to form a necklace. Cut and twist smaller pieces to create knots or branches. Do not join the two ends together yet; you will attach them to the base later.
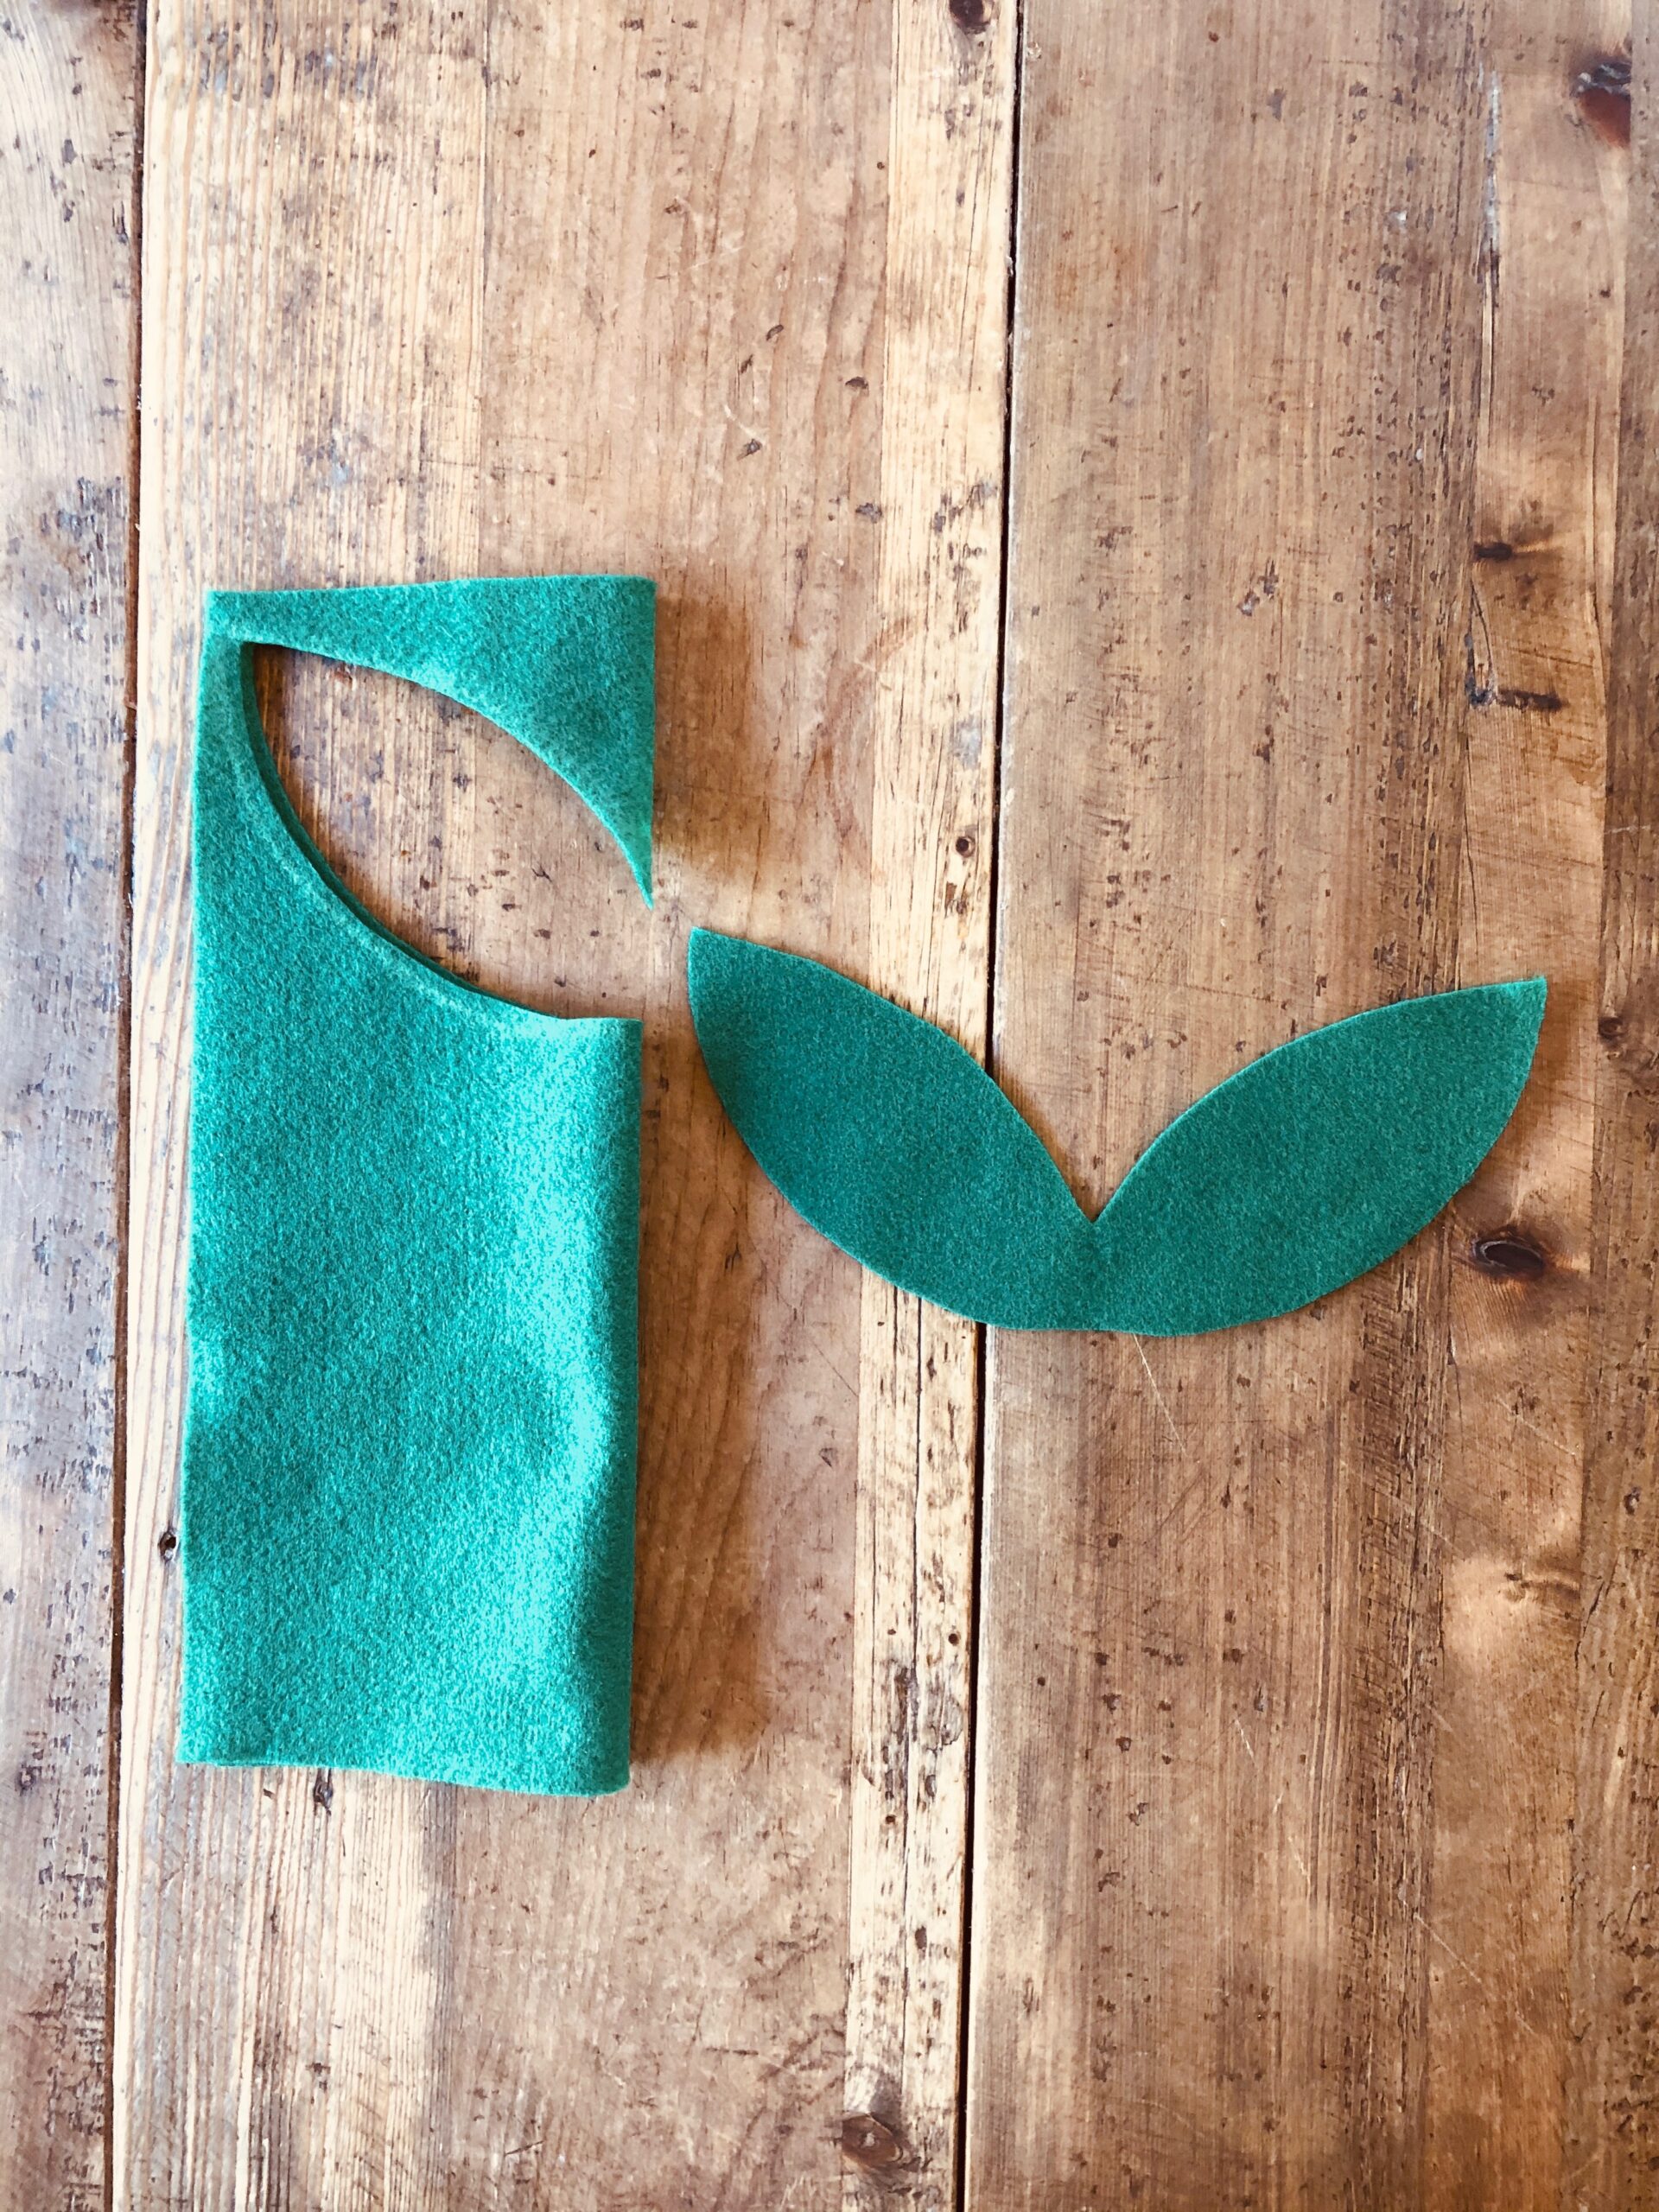
Fold green material in half and cut out a leaf shape. Be sure to avoid cutting on the fold. When you open it, it will look like two leaves connected. This will be the base on which you will glue your flowers.
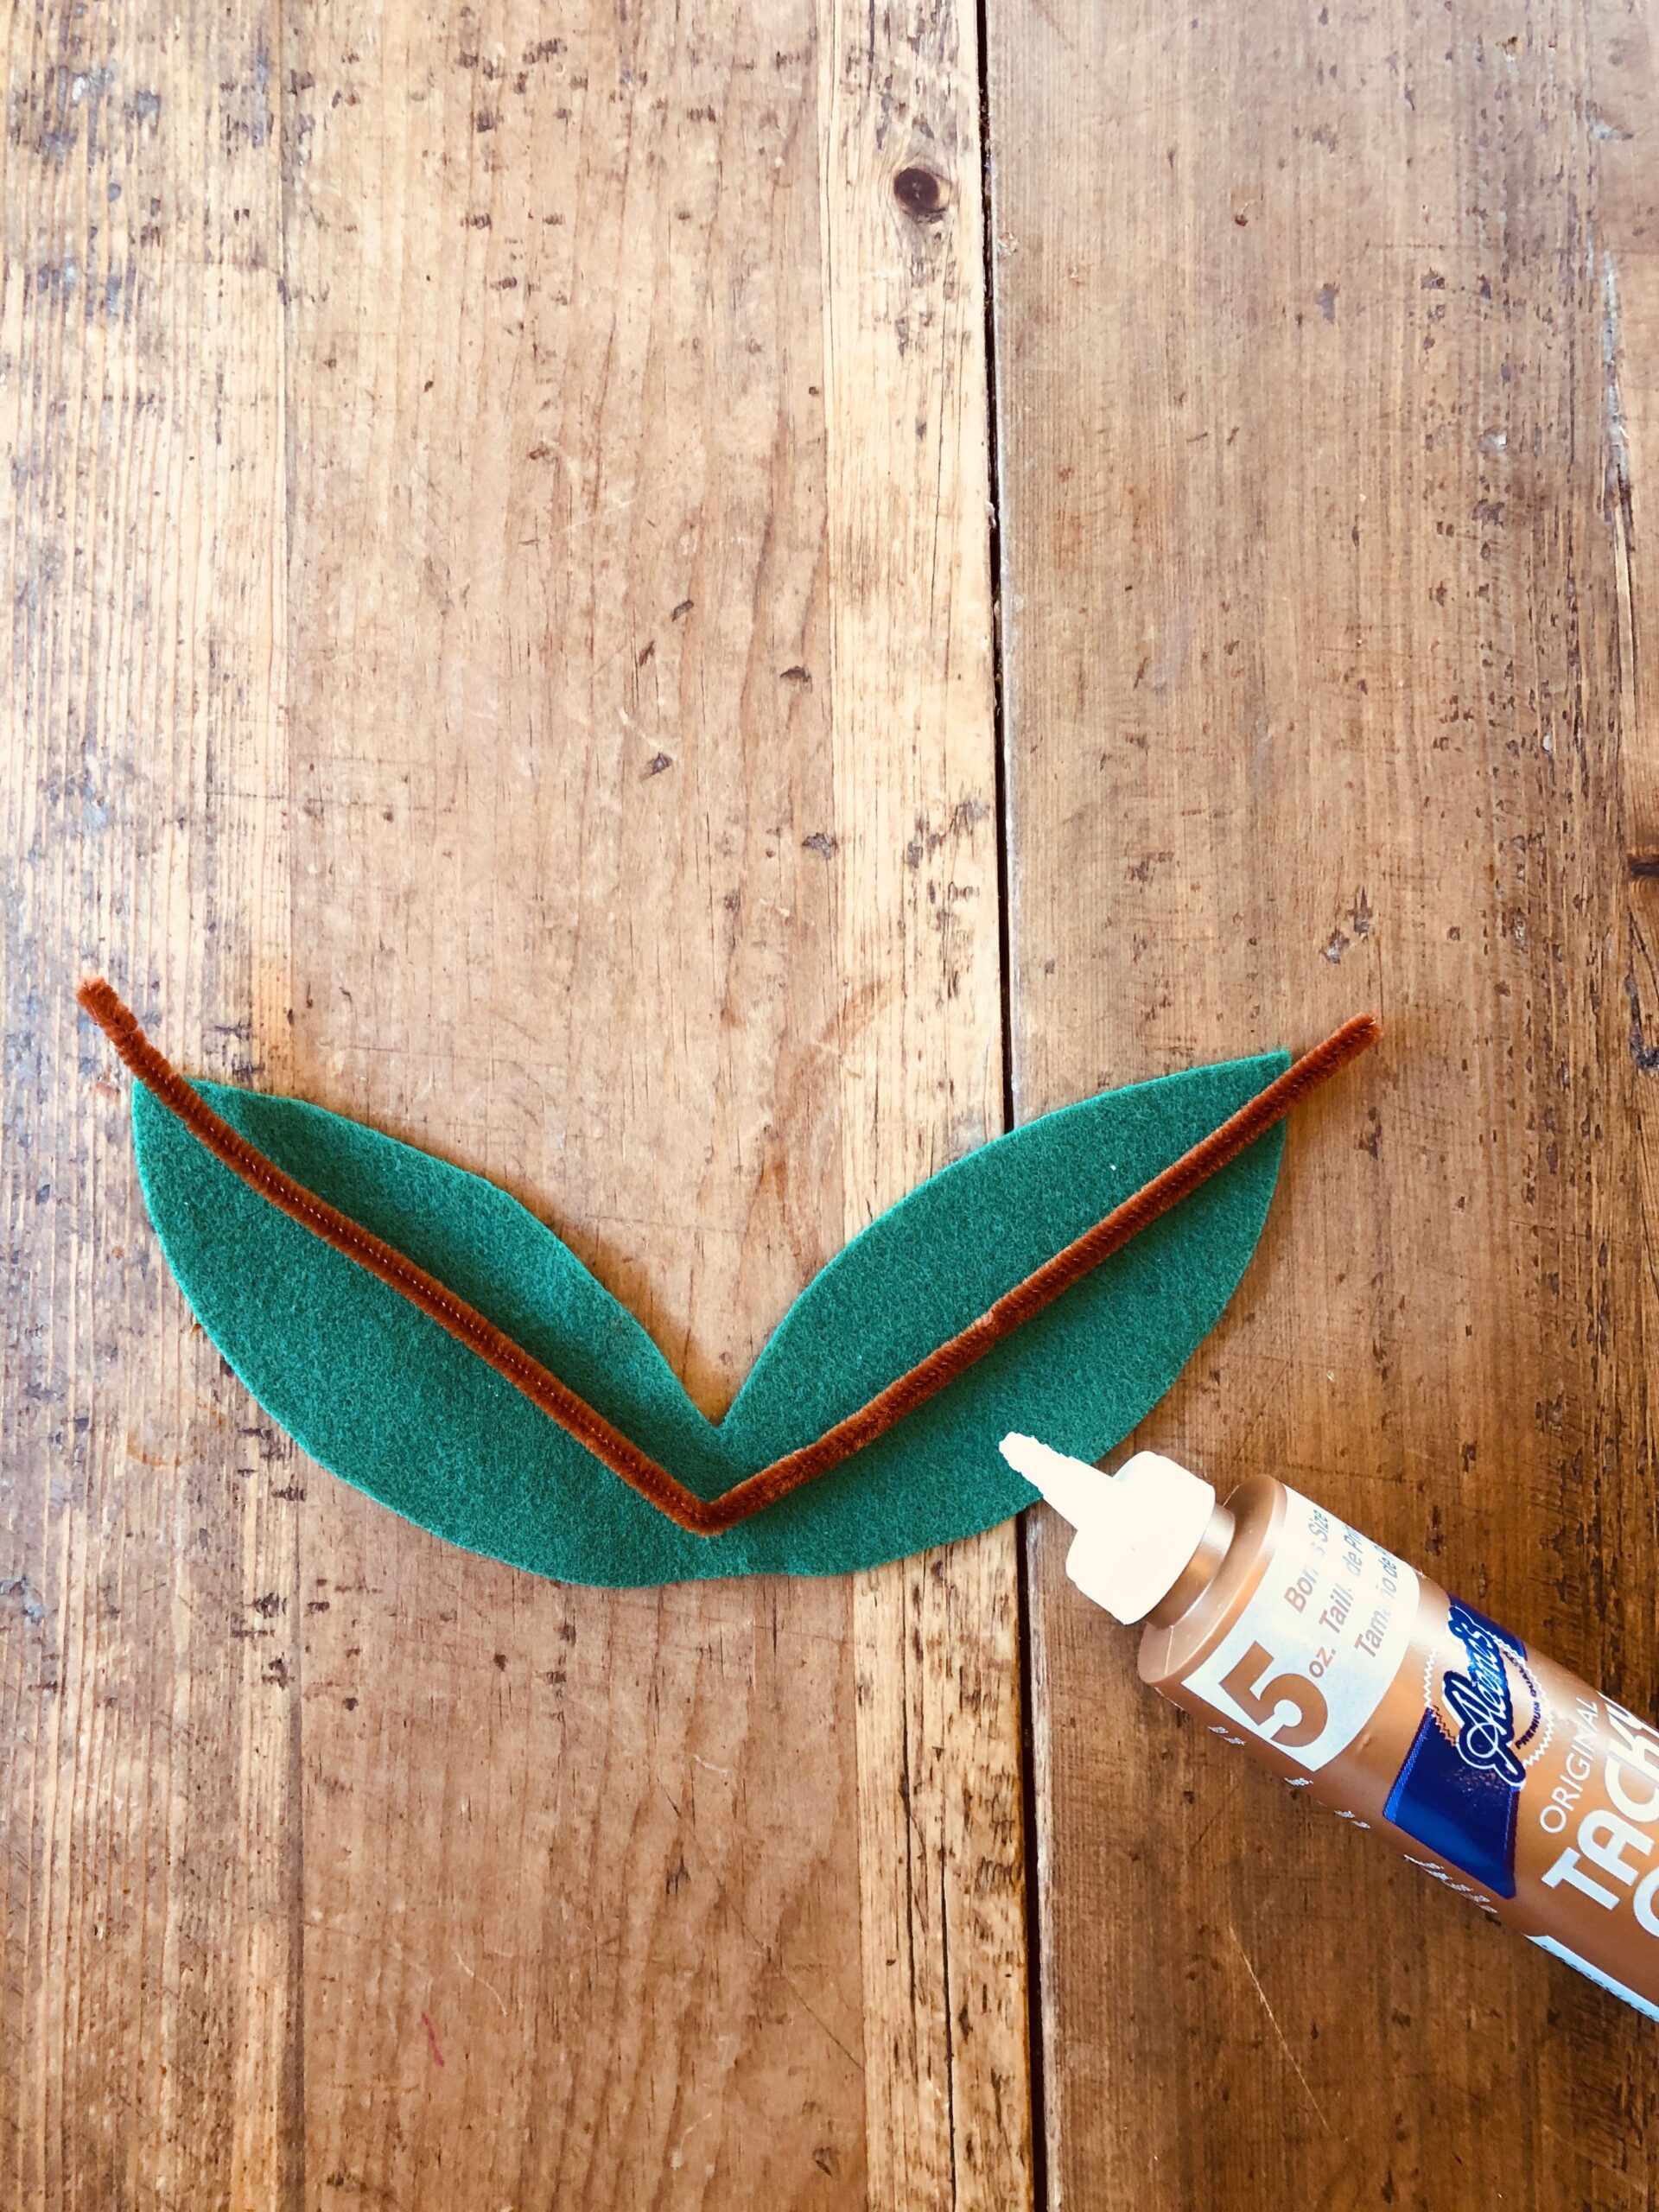
Bend and glue a pipe cleaner to the back of the leaves and let dry. The two ends of the pipe cleaner should extend beyond the leaves; this is where you will attach the necklace later.
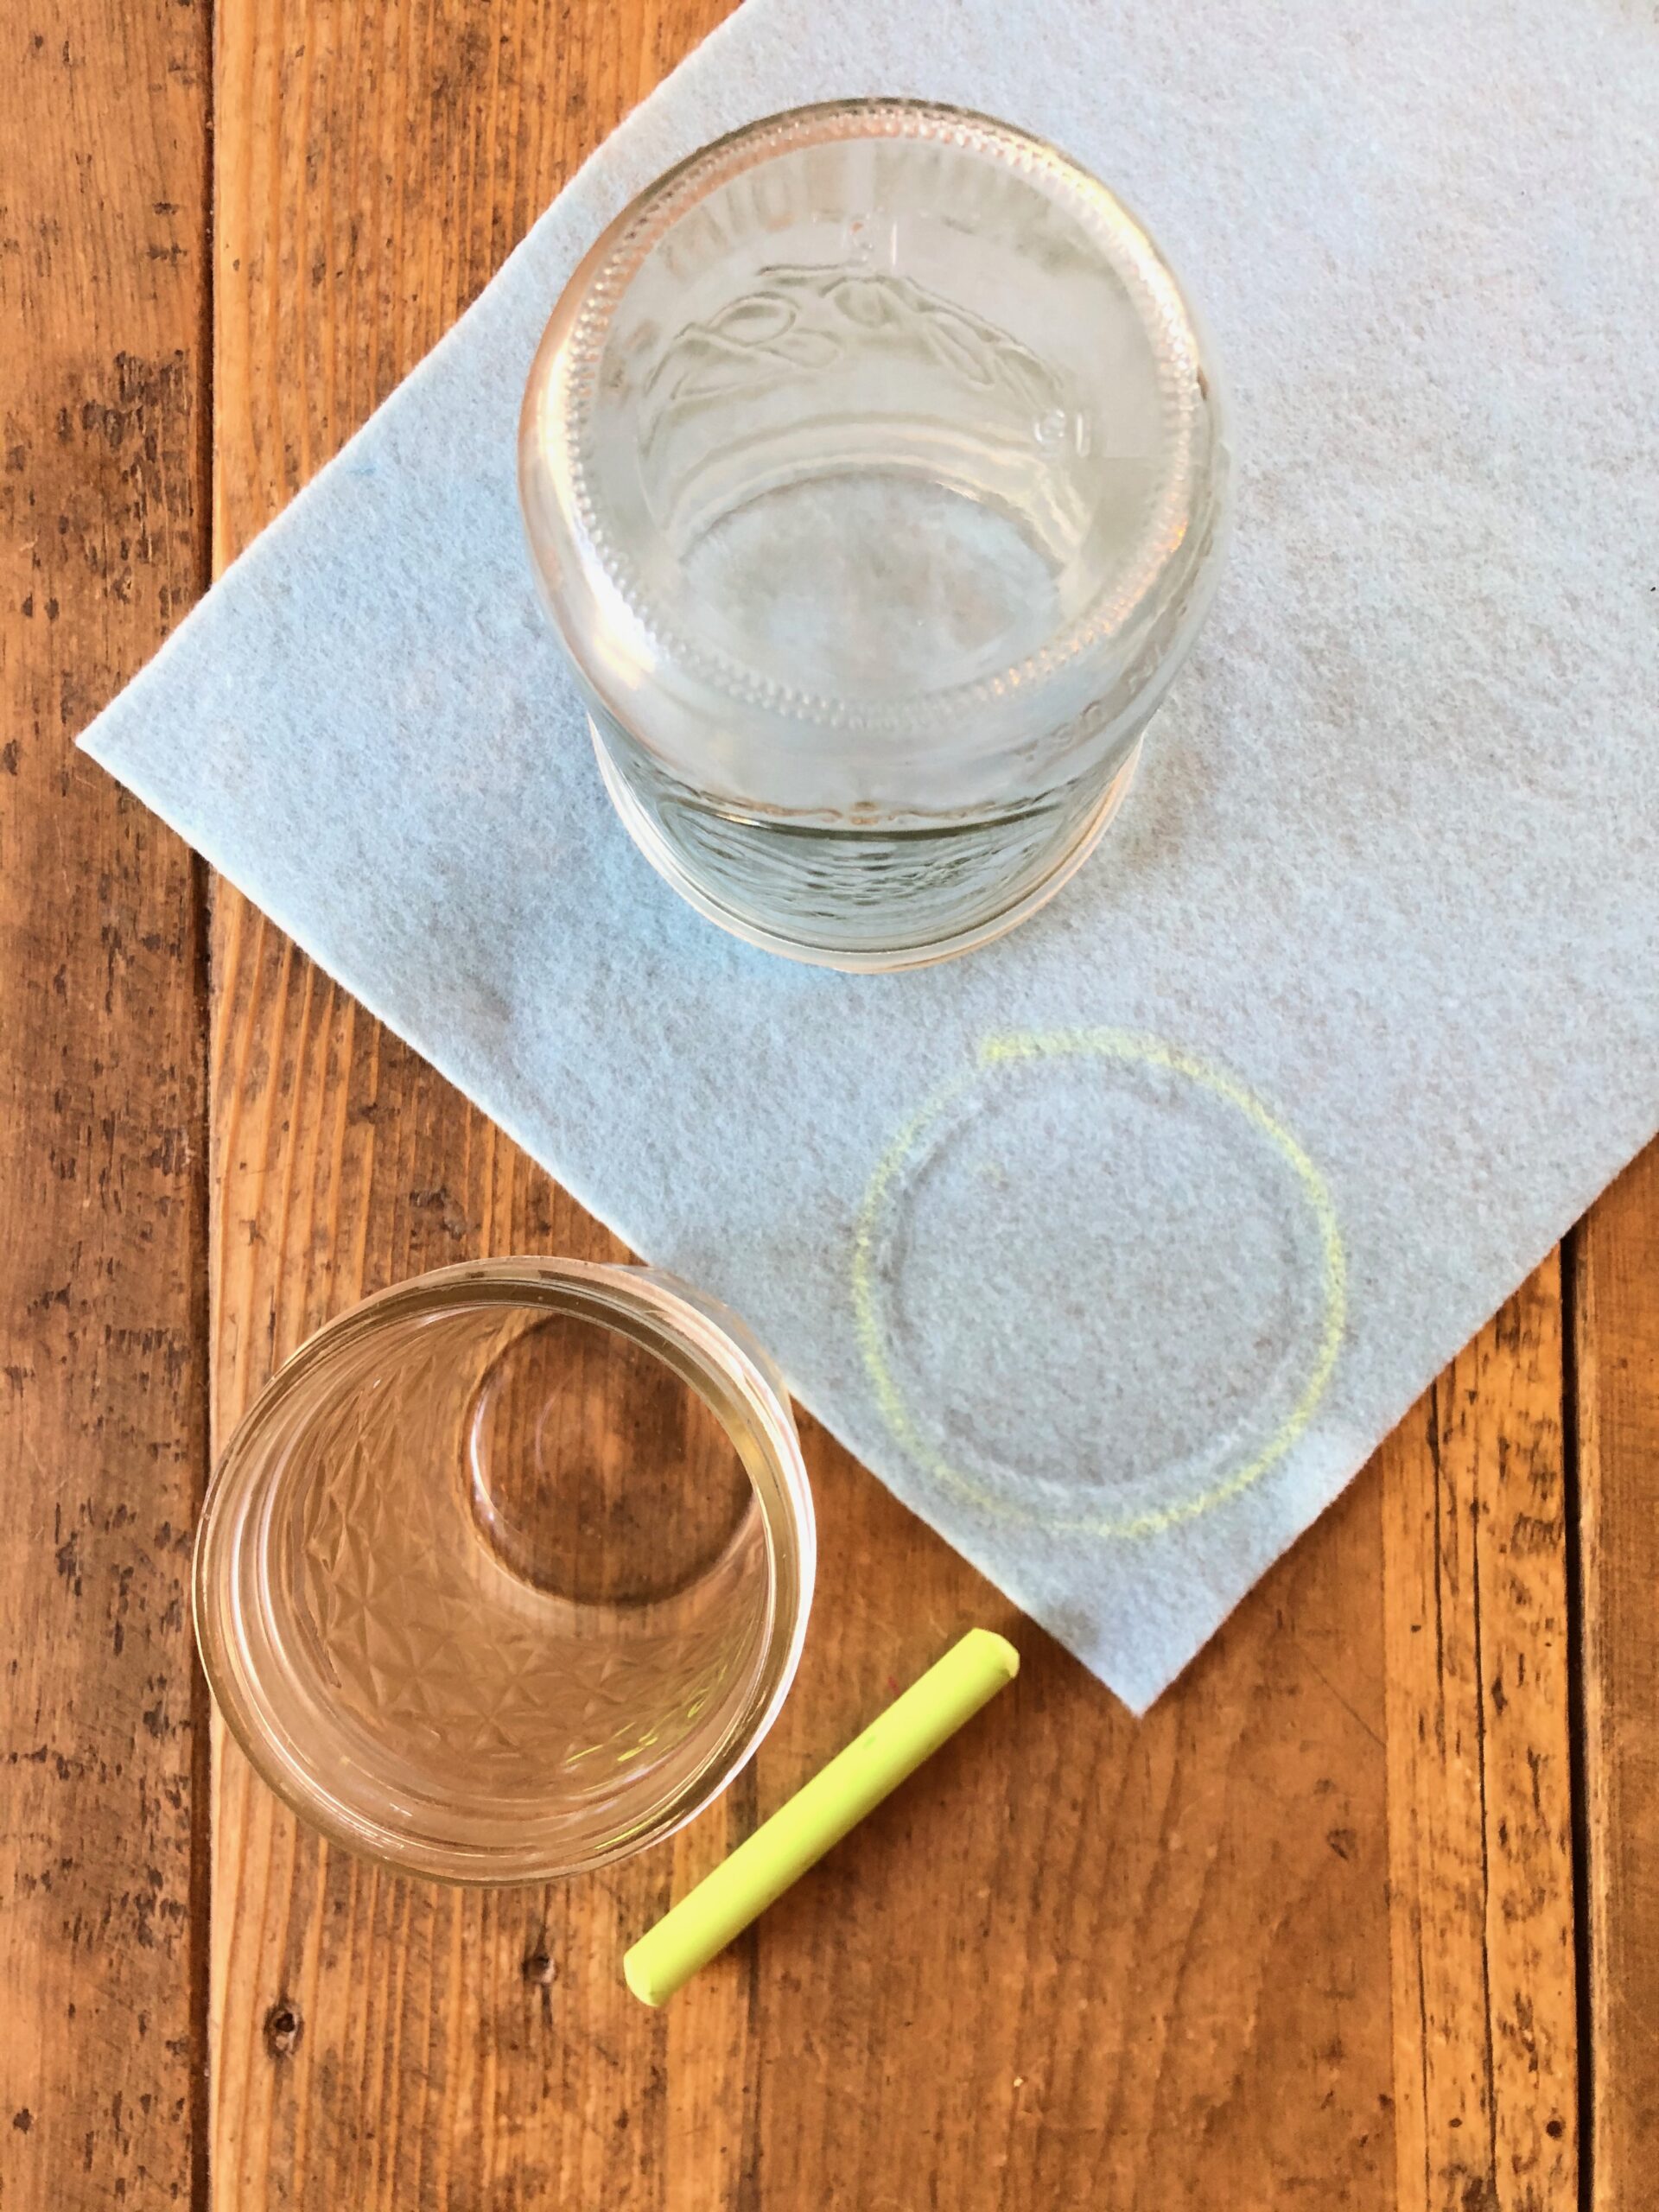
Start with a piece of felt or colored paper. Trace and cut out a circular shape. (It does not need to be perfect!)
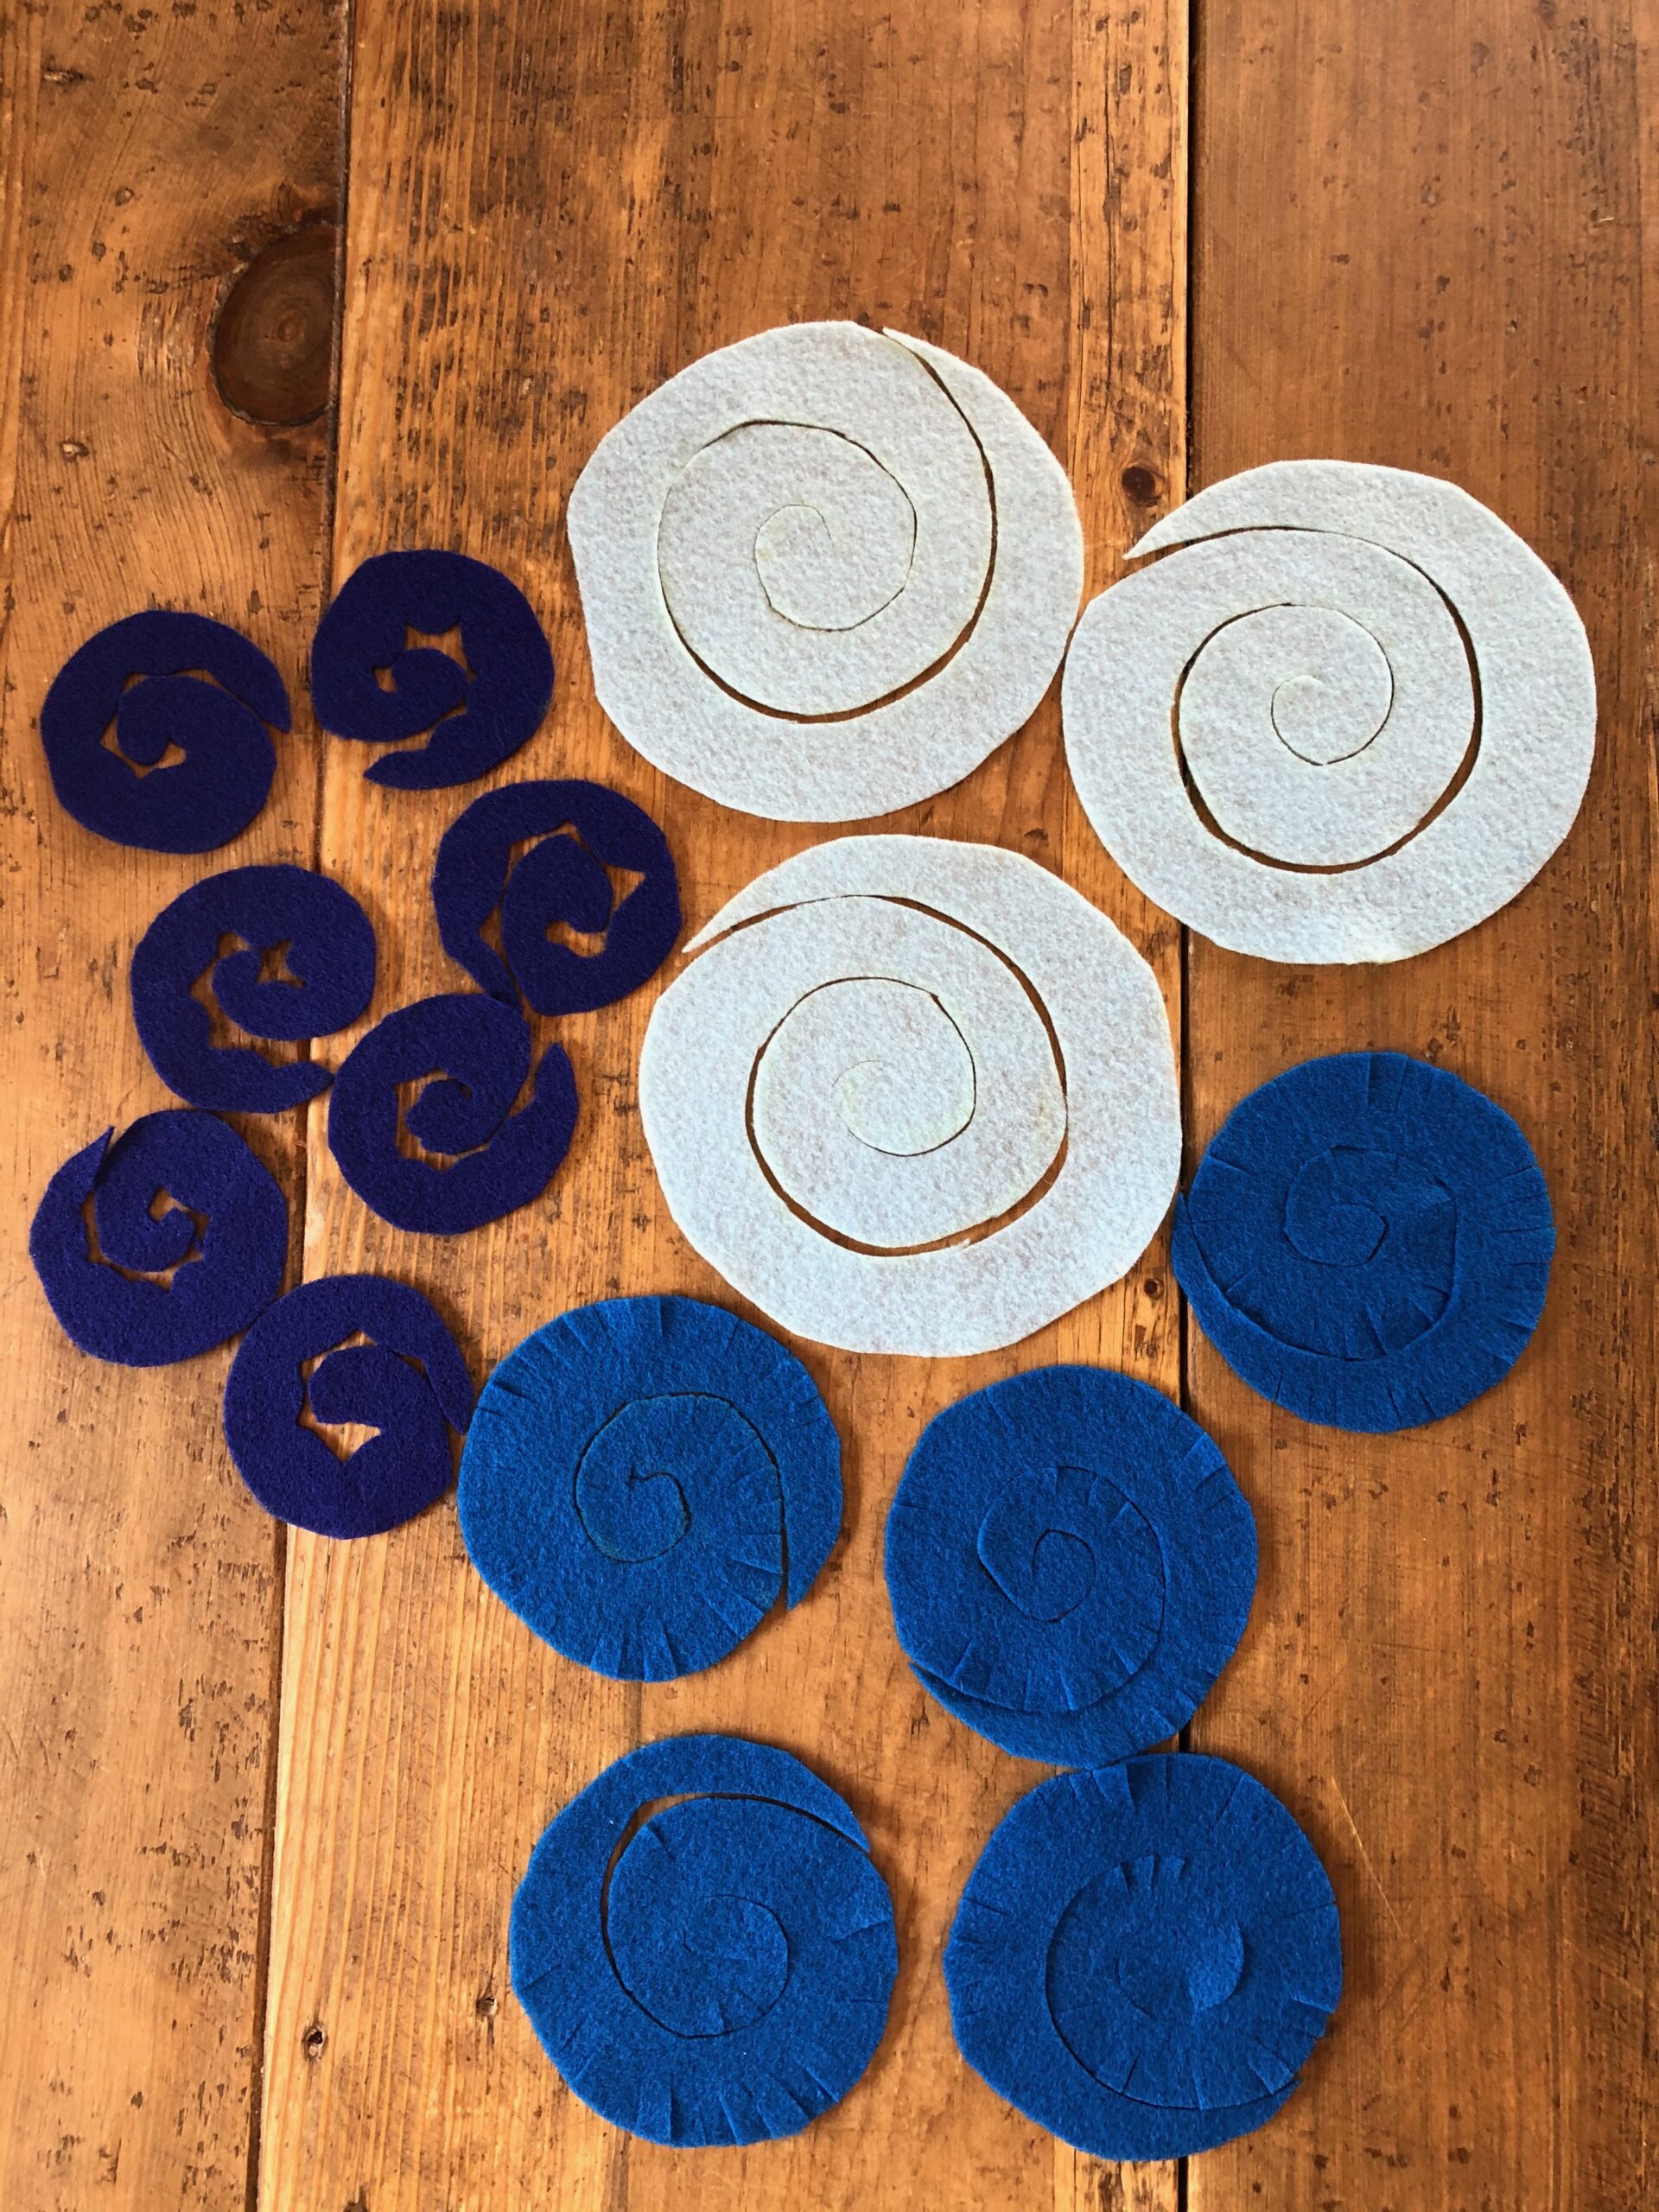
Using a pencil or chalk, draw a spiral from the outer edge to the middle of the circle. Cut along your pencil line.
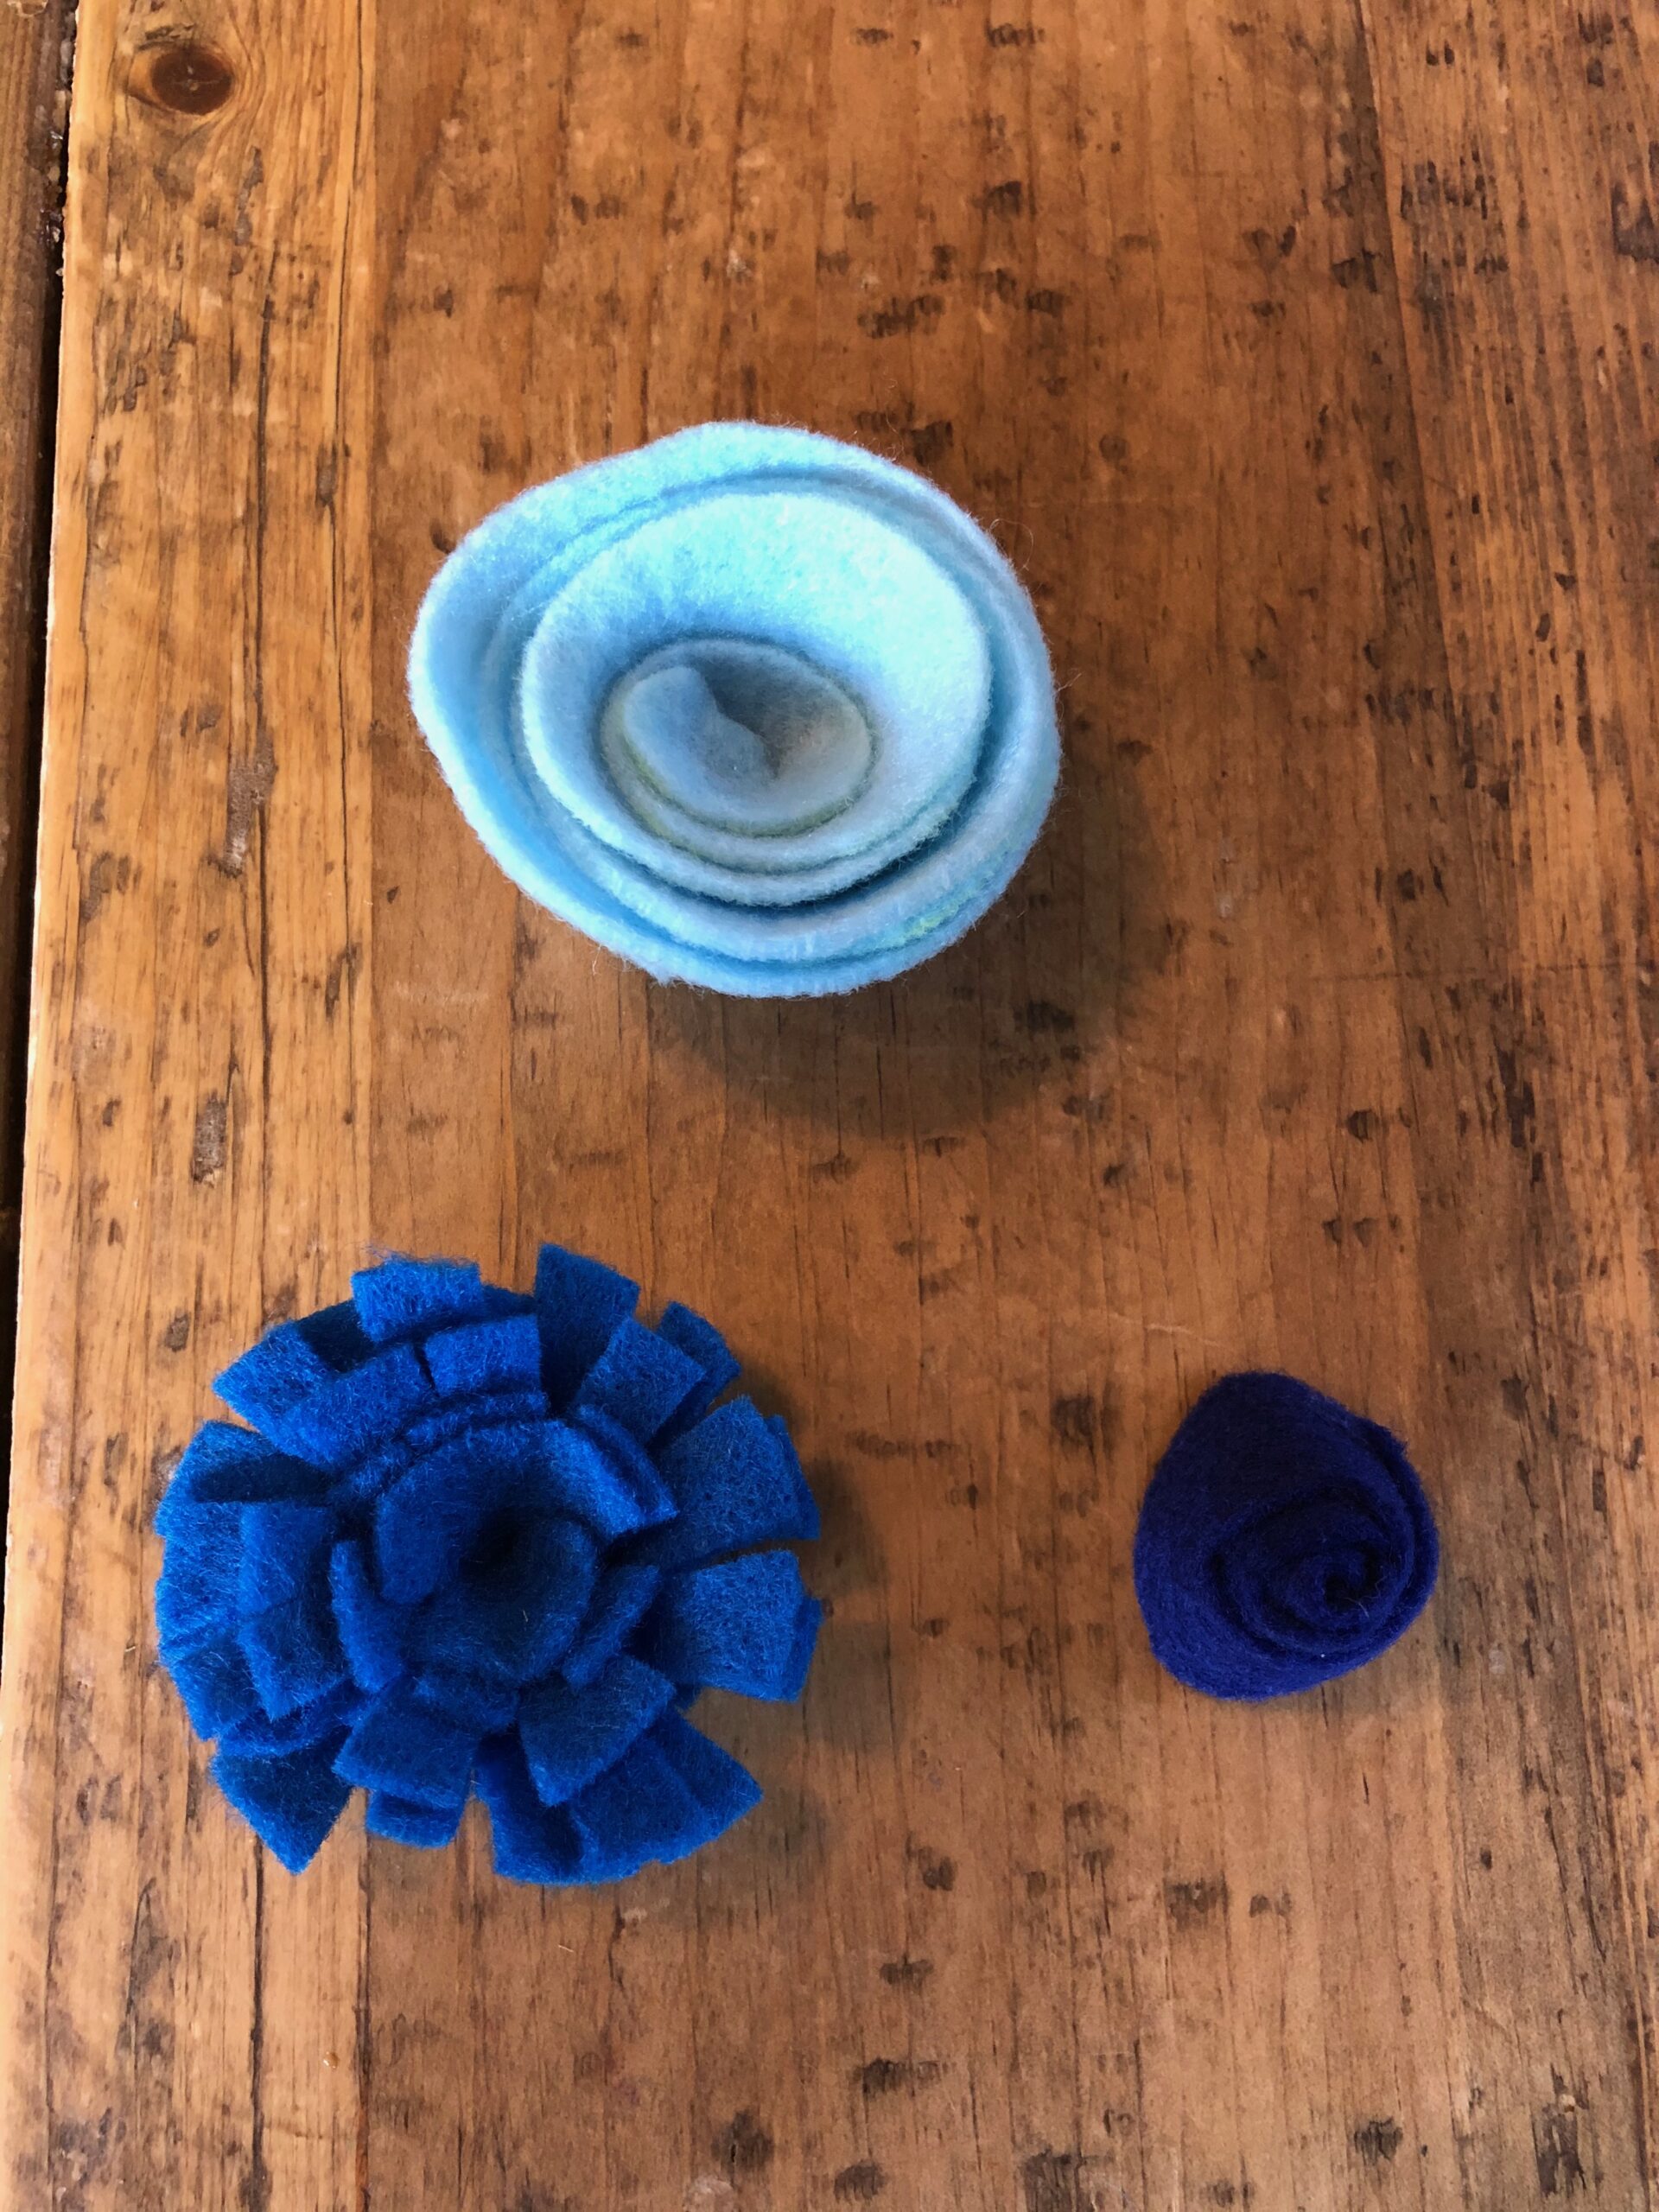
Beginning with the inside end of your spiral, roll your material tightly using your thumb and forefinger to hold it in place as you add layers. Put a small amount of glue on the tail end to keep it together and let dry. Continue making different size and color flowers. You can turn one of the smaller size flowers upside down and it will look like a bud.
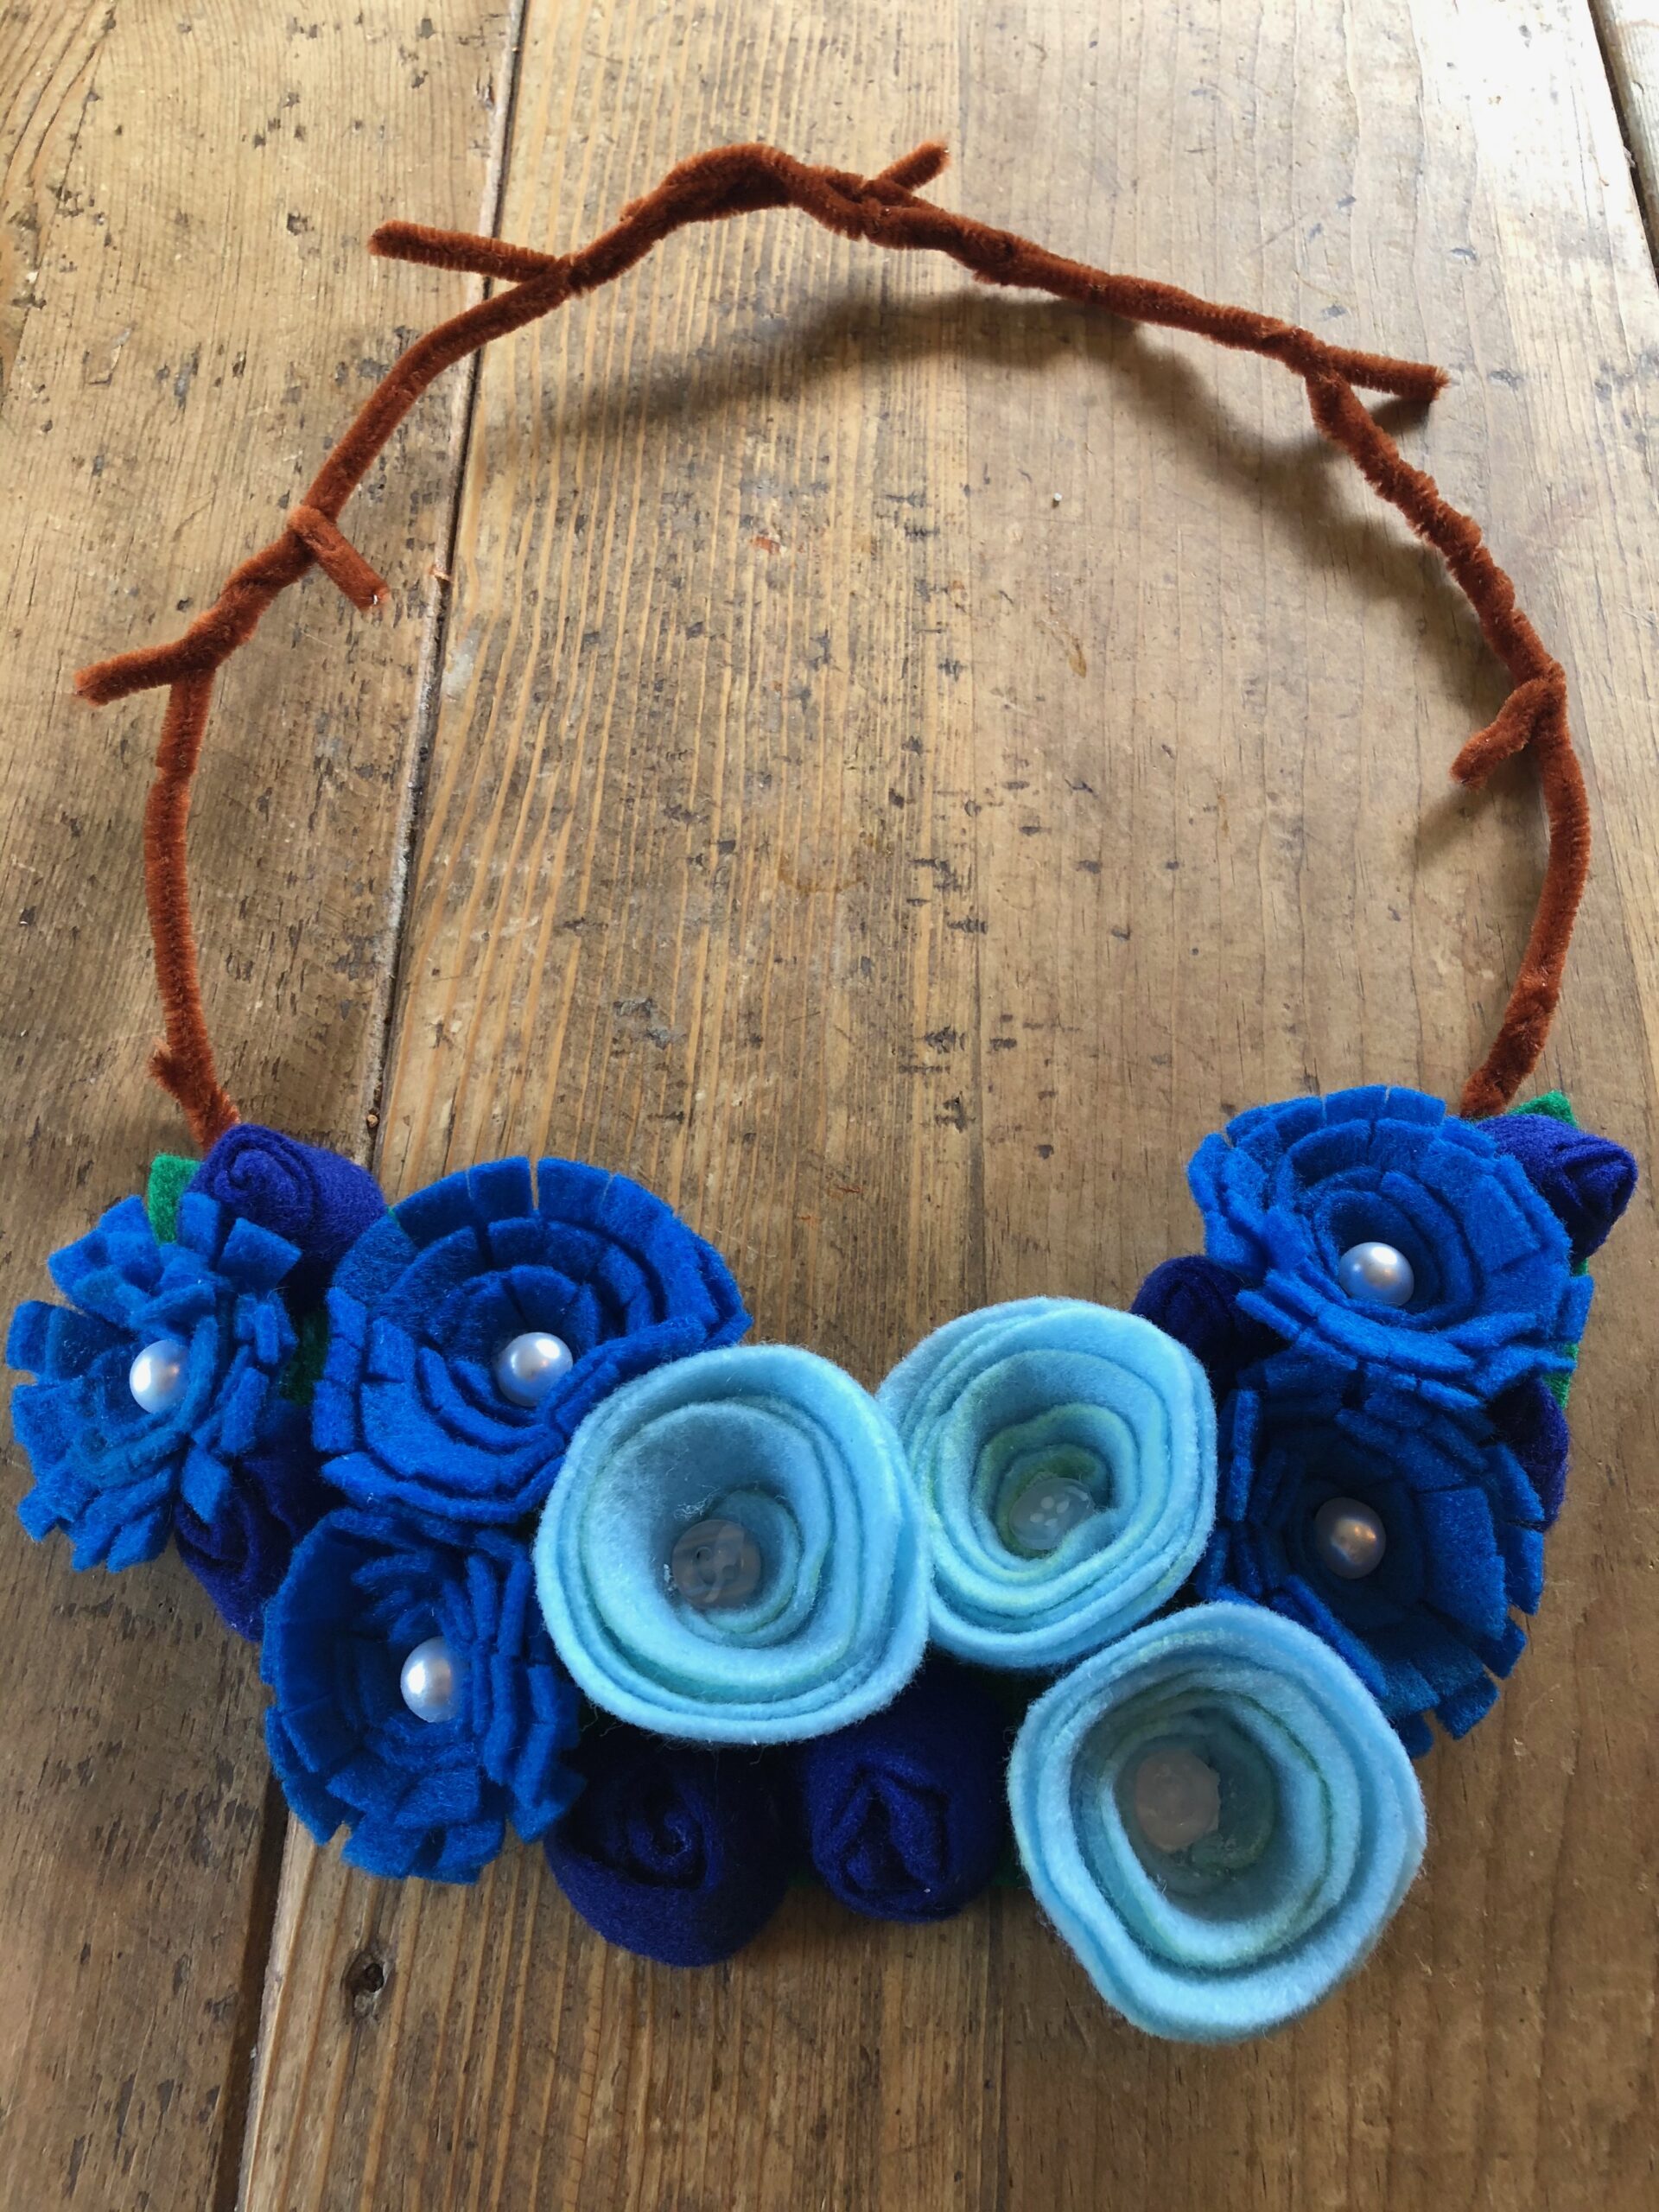
Once all your pieces are finished, glue the flowers to the base. Use old buttons or beads to decorate the center. Once everything is dry, connect the base to the other two branches of the necklace by twisting them together.
Option: If you prefer to make a card, fold a piece of paper in half and glue the paper flowers to the front.
Challenge: Instead of cutting right on the line, cut a scalloped edge or use patterned craft scissors for visual interest. Add details such as leaves.
Simplify: Use larger paper and/or pre-cut spirals.
This idea brought to you by Maggie Burgan.