[vc_row][vc_column][vc_column_text]
Get your weave on with items you have at home
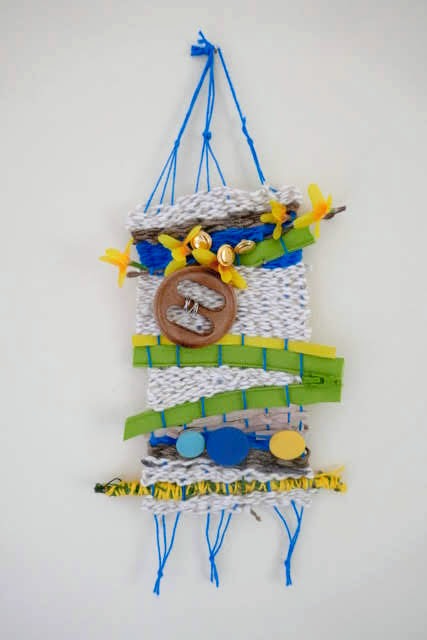
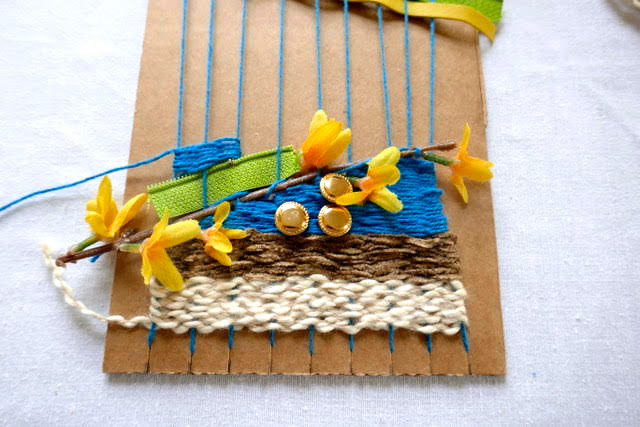
All you need is a piece of cardboard and a few basic materials to create your own portable loom at home. This weaving project is inspired by John Garrett’s piece, Tales Told on a Sunday Afternoon Between Los Cordovas and the Pilar Landslide, in which he incorporates found objects from a hike he took in his home state of New Mexico.

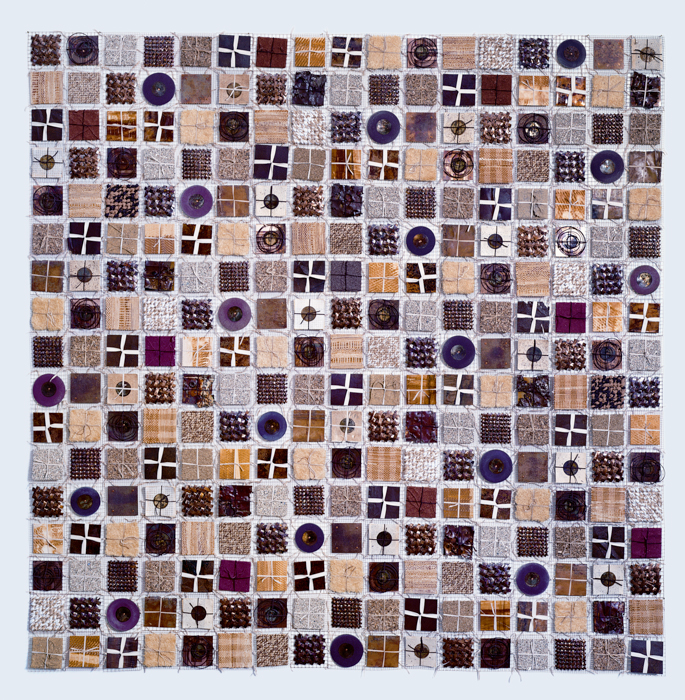
John Garrett (American, 1950– ). Tales Told on a Sunday Afternoon Between Los Cordovas and the Pilar Landslide, 1997, fiber, metal, found objects. Museum Purchase: Funds provided by Fred and Emily Gurtman. 1997.109. © 1997 John Garrett
[/vc_column_text][vc_column_text]
Supplies
- Cardboard
- Ruler
- Pencil
- Scissors
- Large-eye blunt needle (try finger weaving if you don’t have a needle)
[/vc_column_text][vc_separator][/vc_column][/vc_row][vc_row][vc_column][vc_column_text]Gather your found objects. Searching your house and yard for found objects is half the fun! Look for things that can be woven with like sprigs of plants, twist ties, and rubber bands. Old buttons and beads are fun to thread onto yarn while weaving. [/vc_column_text][vc_empty_space][vc_column_text]Find your piece of cardboard. It can be any size. Your woven piece can be as large as your cardboard. Think about what you want to turn your weaving into. It can be a wall hanging, bookmark, coaster, or anything else you imagine. [/vc_column_text][vc_empty_space][vc_column_text]Use a ruler and pencil to make a mark every ½ inch along the top and the bottom edge of your cardboard. Then use scissors to cut a half-inch slit over each mark you made. [/vc_column_text][vc_empty_space][/vc_column][/vc_row][vc_row][vc_column][vc_column_text]Choose a piece yarn to wrap your loom with to create the vertical elements of your weaving, or the warp. Starting from the backside or your loom, leave a 6 inch tail at the back and wrap your yarn through the first row of notches. Continue wrapping your loom until all notches have a row of yarn sitting in them. Cut your excess yarn, and leave a 6 inch tail at the back of your loom. You can tape these tails to your loom if you think they’ll be in your way. [/vc_column_text][vc_empty_space][/vc_column][/vc_row][vc_row][vc_column][vc_column_text]
Now you can start weaving. Simply weave your pieces over and under each strand of the warp. Under the first string, over the second, under the third, etc. If you have found objects that seem difficult to weave with, go ahead and start with those, and then fill in the gaps with your more manageable yarn pieces. [/vc_column_text][vc_empty_space][/vc_column][/vc_row][vc_row repeat=”repeat-x” position=”50% 100%” background=”https://mintmuseumold.wpengine.com/wp-content/uploads/2020/10/DiamondPatternFade-Website.png”][vc_column][vc_column_text]When weaving with yarn, cut pieces to 10-12 inches. This gives you a reasonable length to work with while avoiding it turning into a tangled mess. Don’t pull the yarn too tight, as this can cause your whole piece to become warped.
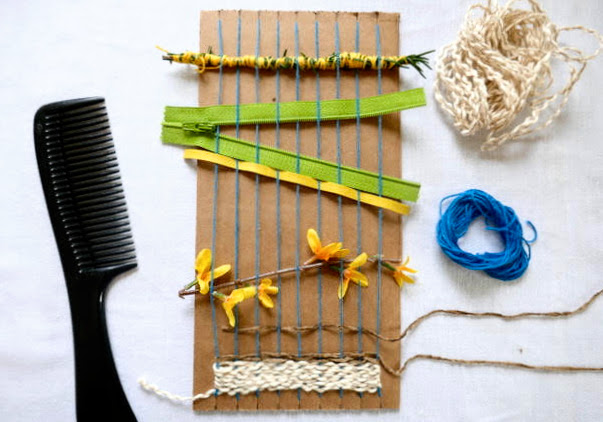
When you reach the end of your working yarn, tie a knot around the final strand of warp and either use a needle to tuck it into your piece, or just trim the tail off. To begin a new row, simply cut a new piece of yarn and begin again, leaving a 6 inch tail. If you have one, use a comb or a fork to even out rows.
[/vc_column_text][vc_empty_space][vc_separator][vc_empty_space][vc_column_text]
The Mint Museum From Home is Presented By Chase.
[/vc_column_text][vc_empty_space height=”16px”][vc_single_image image=”40658″ img_size=”medium” alignment=”center”][/vc_column][/vc_row]